TL;DR — Clerk's JWT template editor lets you include the active organization's ID and role via {{org.id}} and {{org.role}}. Older Clerk docs used {{organization.id}} and {{organization.role}} — those are the same variables, just renamed. Use the current names in new templates. This post shows the claims to include, the issuer URL to paste into Centrali, the claim mappings that connect the two, and a minimal Next.js example.
You're in the Clerk JWT template editor. The Claims field is blank. You know you want the user's org context in the token — so your authorization layer can decide what this person can do — but the variable reference is confusing. Is it {{organization.id}} or {{org.id}}? What about {{org.role}} vs {{organization.role}}? Which claim names should you use on the Centrali side?
This guide answers all of it. Copy-paste the template, paste the issuer URL, map the claims — you're done in ten minutes.
{{organization.id}} vs {{org.id}} — which do I use?
Both refer to the same thing: the ID of the user's active organization at the moment Clerk issues the token. Clerk shortened the variable names (organization → org) in their JWT template system a while back. Both forms still appear in tutorials and older answers, which is why the question keeps showing up in search.
Use {{org.id}} and {{org.role}} in new templates. The longer forms ({{organization.id}}, {{organization.role}}) still work in existing templates — Clerk hasn't deprecated them — but new templates and new docs use the short form.
If you have an existing template using the long form and it's working, leave it alone. If you're creating one now, use the short form.
Prerequisites
- A Clerk application with Organizations enabled (Configure → Organizations → Enabled)
- A Centrali workspace
- The Centrali SDK:
npm install @centrali-io/centrali-sdk
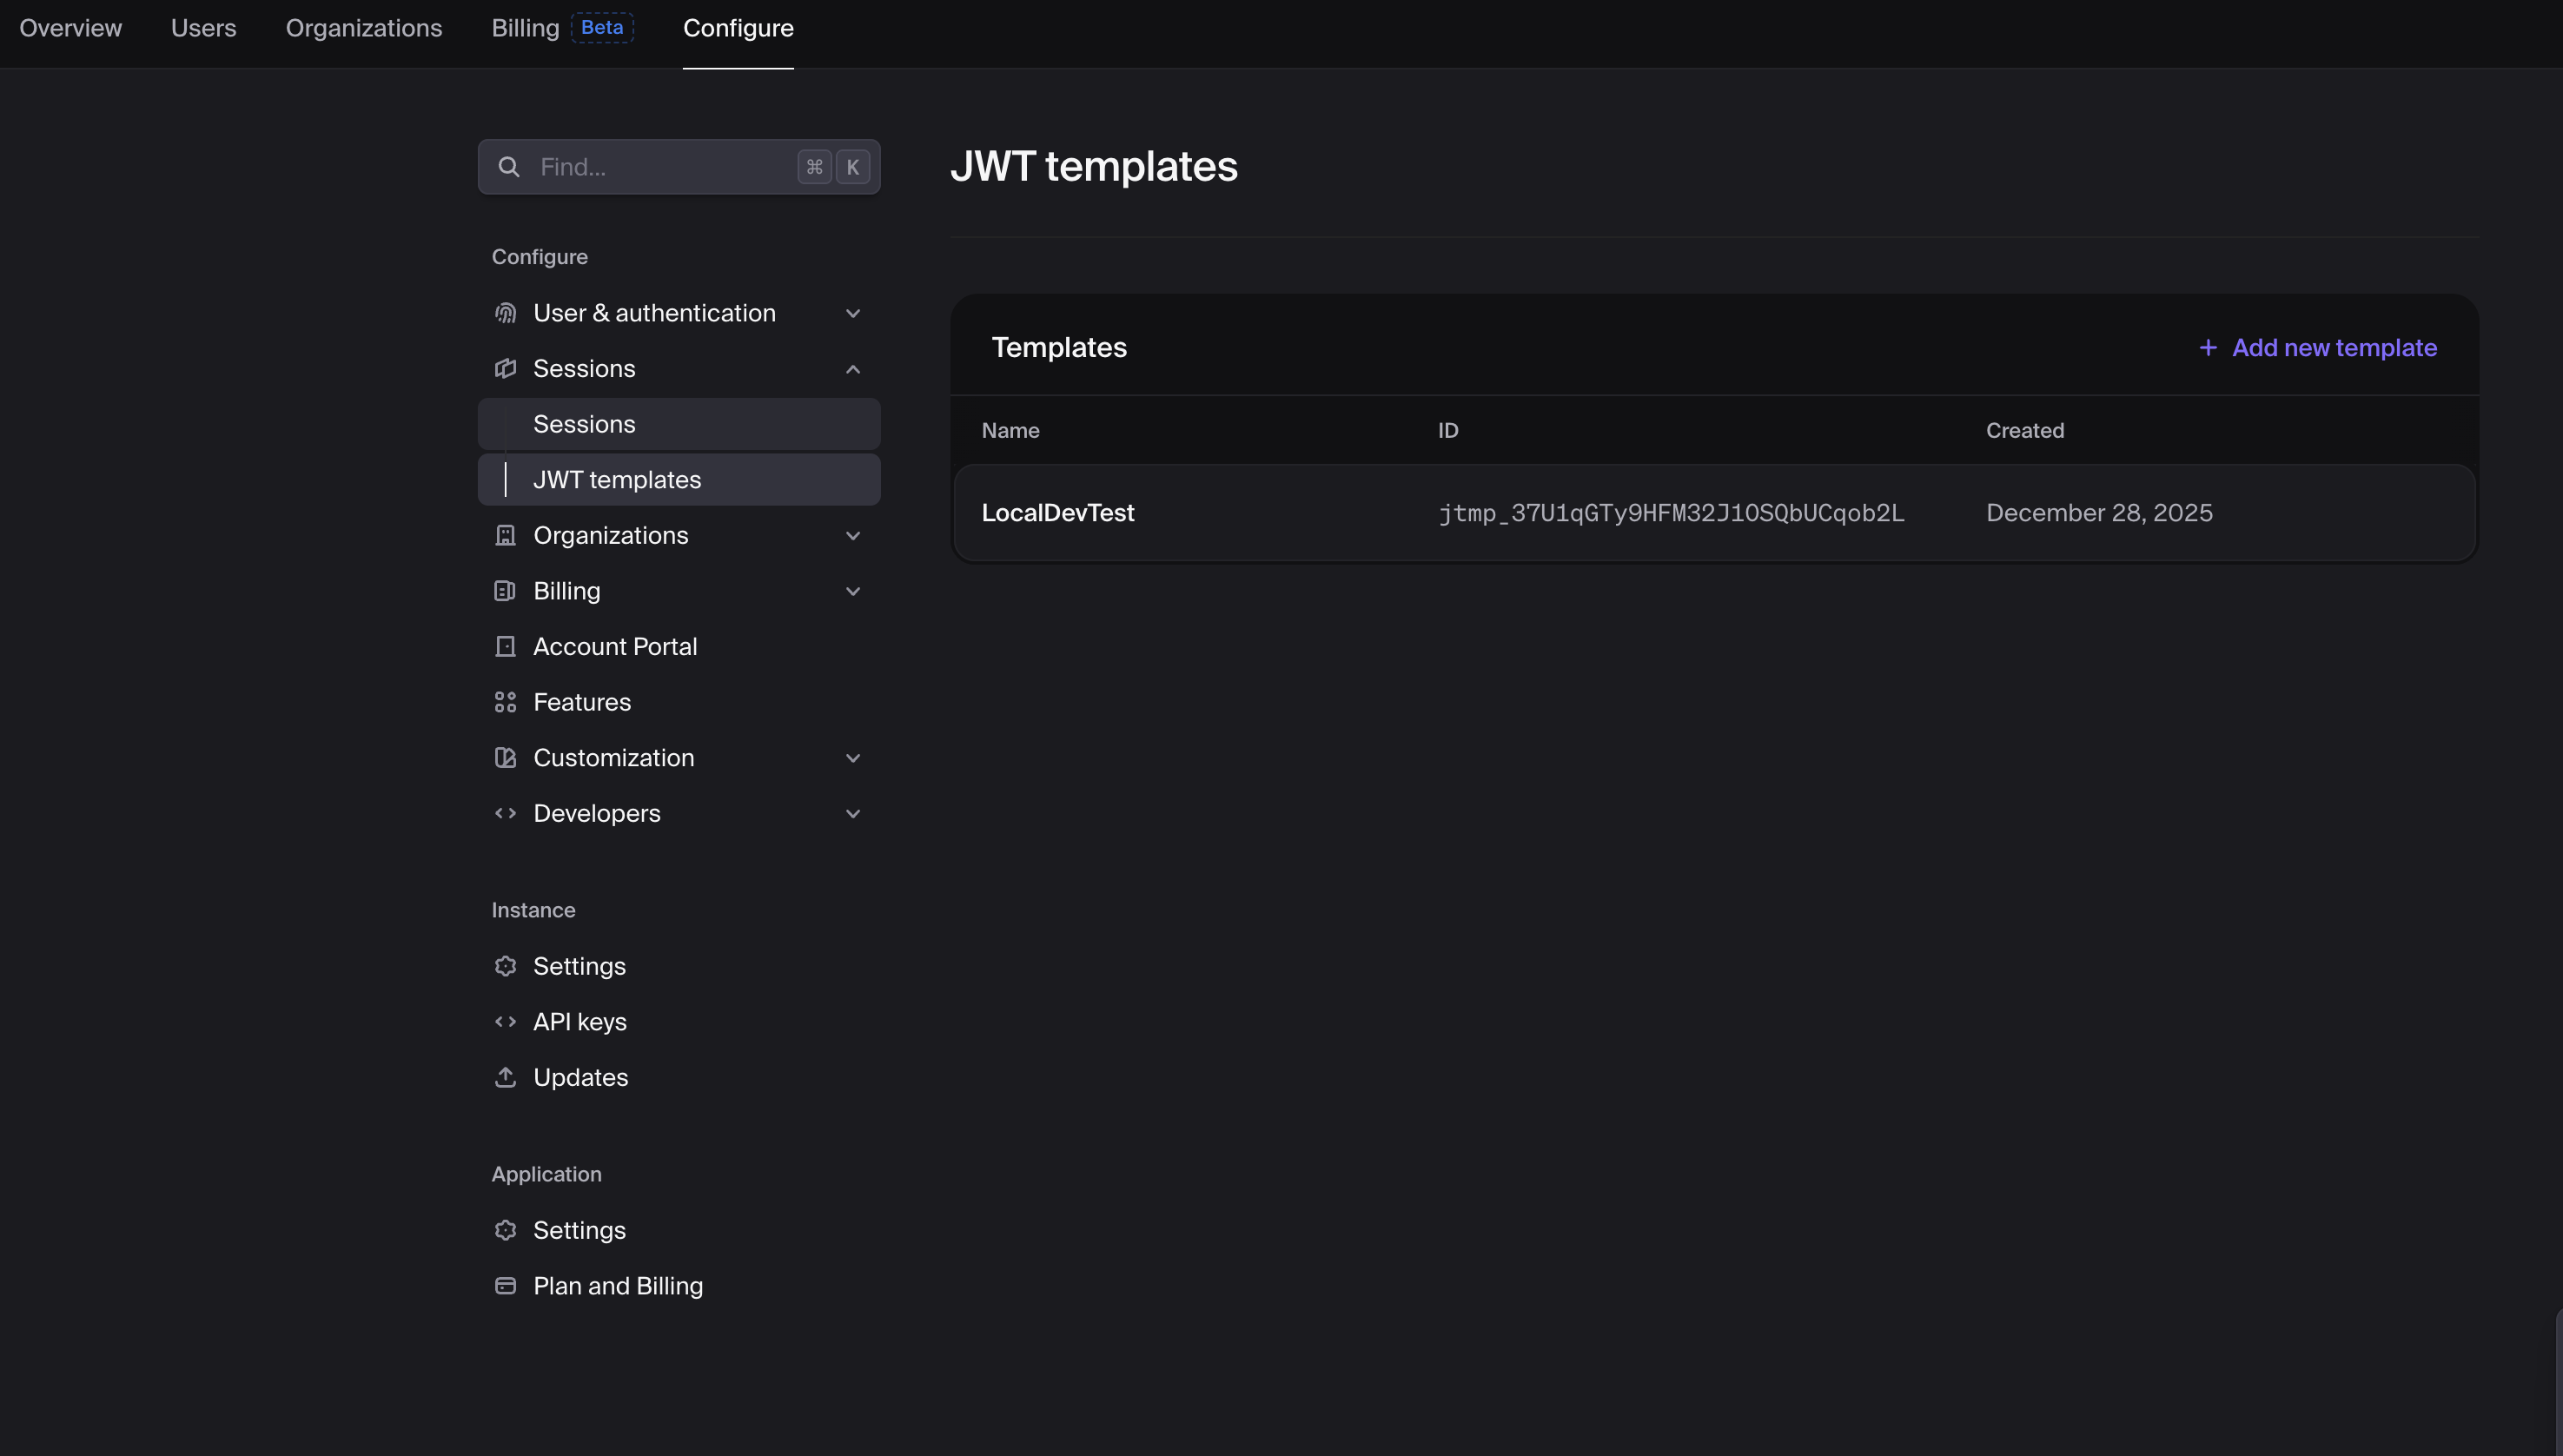
Step 1: Create the Clerk JWT Template
In the Clerk Dashboard: Configure → Sessions → JWT Templates → Add new template → Blank.
Name it centrali (or anything — you'll reference this name from your app).
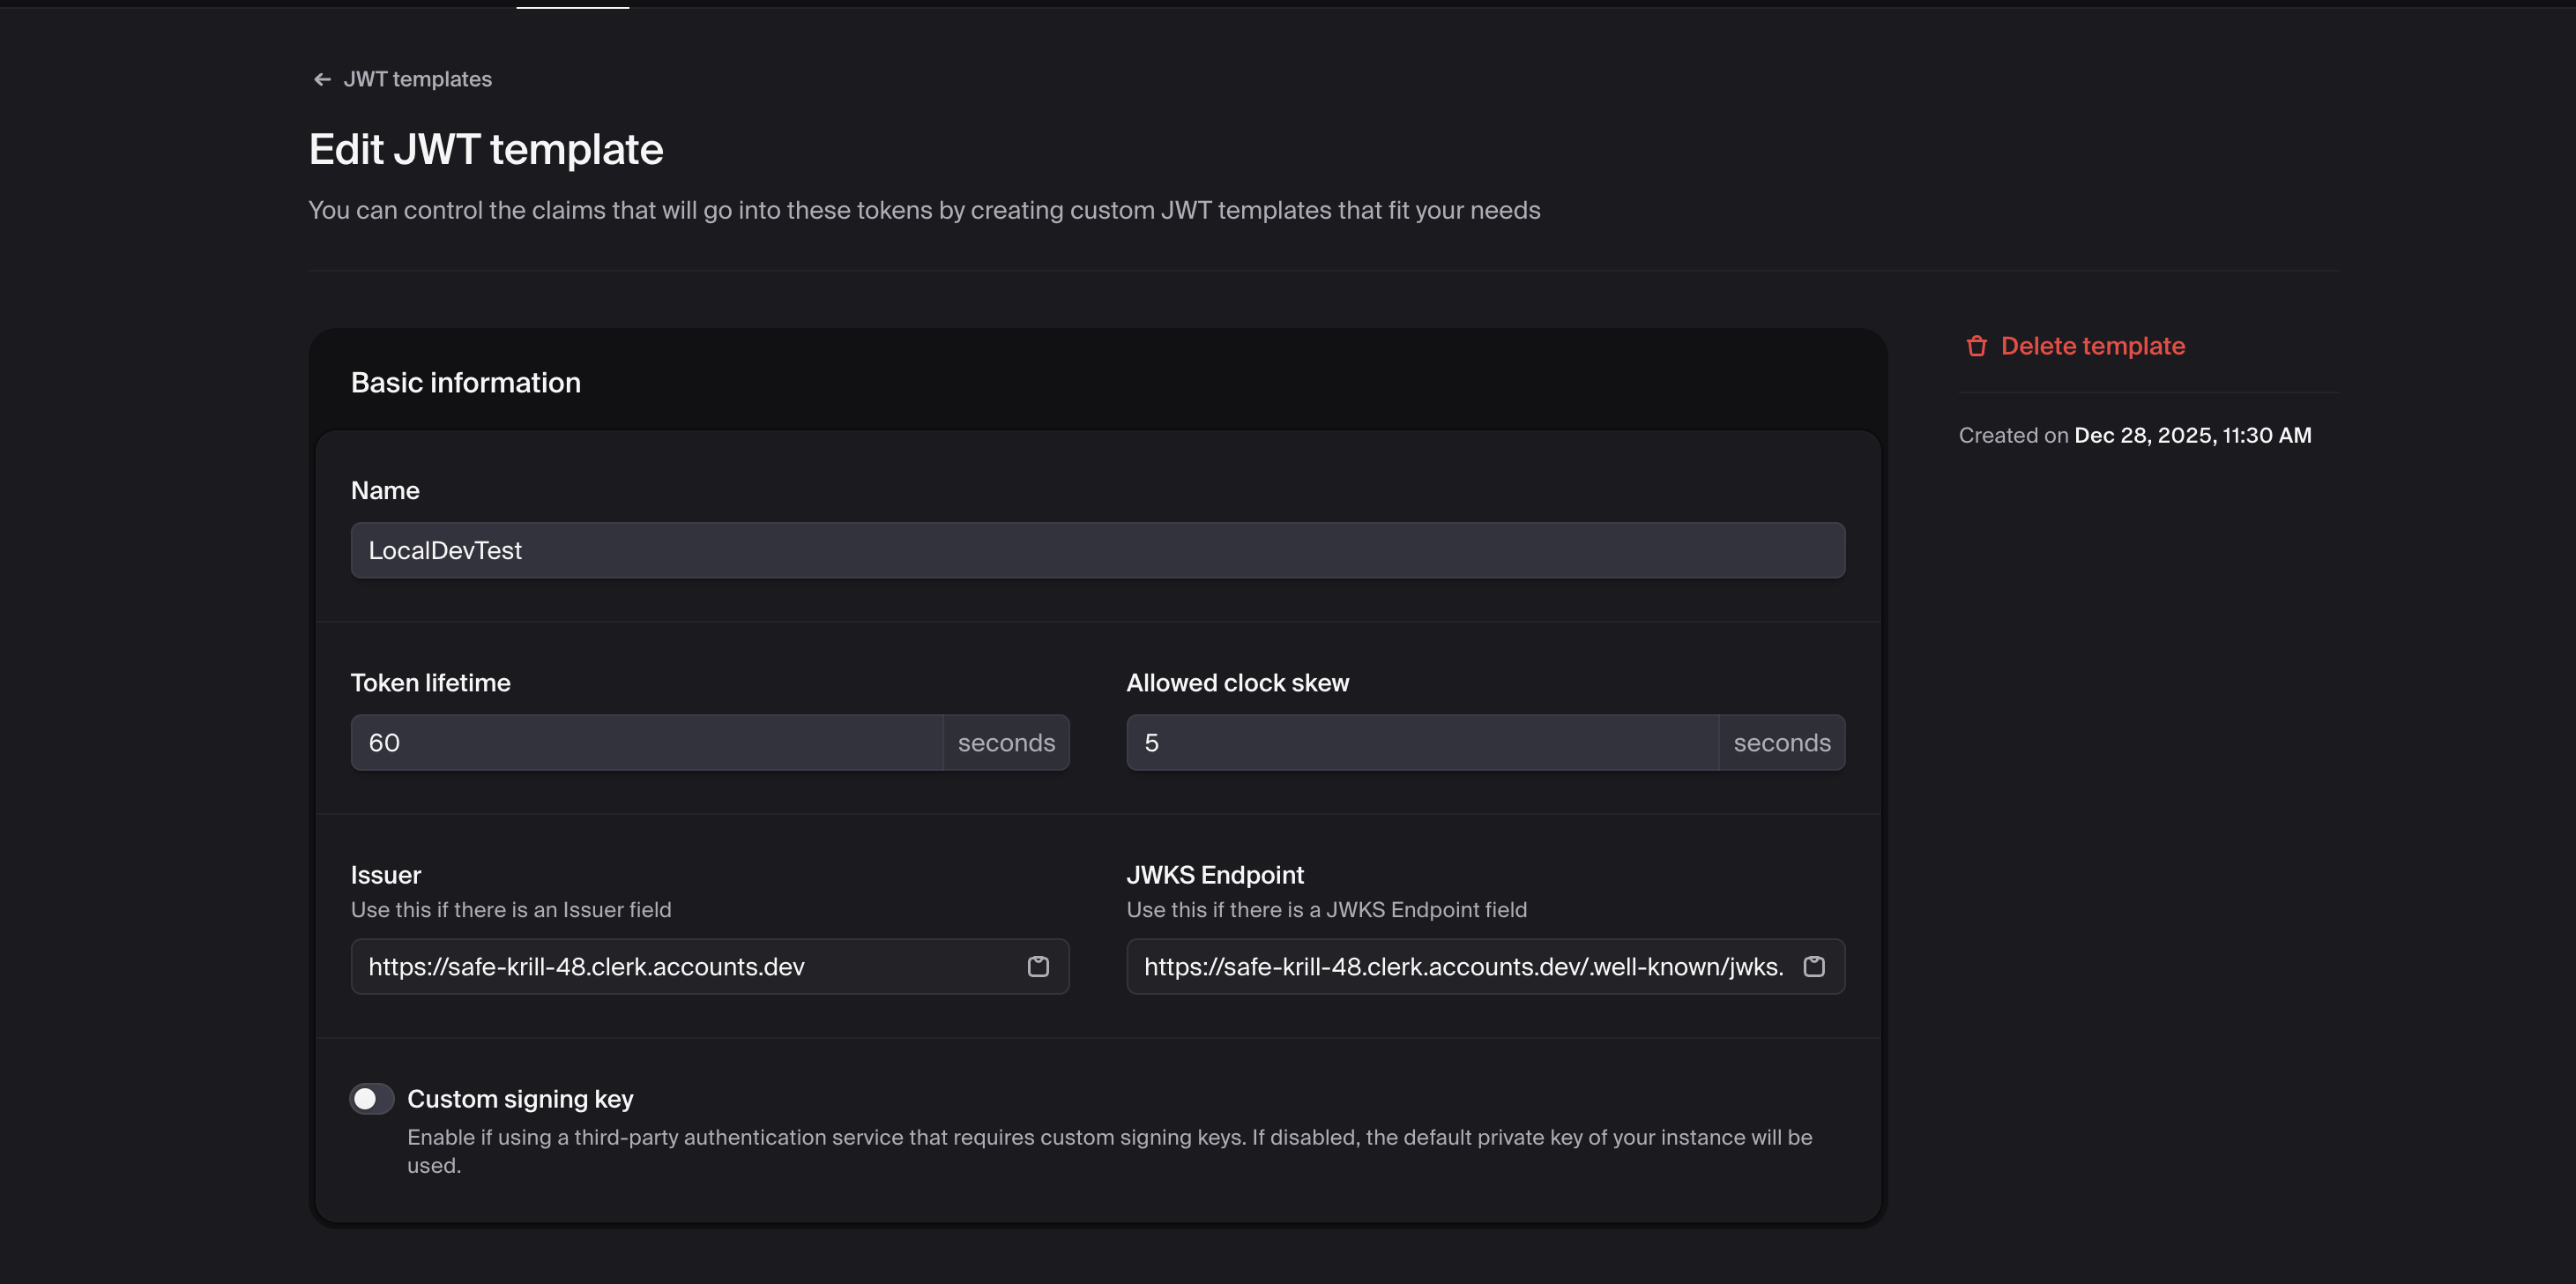
Set the basic fields:
- Token Lifetime: 60–300 seconds. Shorter is safer; longer reduces Clerk API traffic.
- Allowed Clock Skew: 5 seconds is the sane default.
Step 2: Add the Claims
This is the part search queries keep landing on. Here's the claims JSON that works with Centrali:
{"aud": "centrali","name": "{{user.full_name}}","email": "{{user.primary_email_address}}","role": "{{user.public_metadata.role}}","plan": "{{user.public_metadata.plan}}","org_id": "{{org.id}}","org_role": "{{org.role}}"}
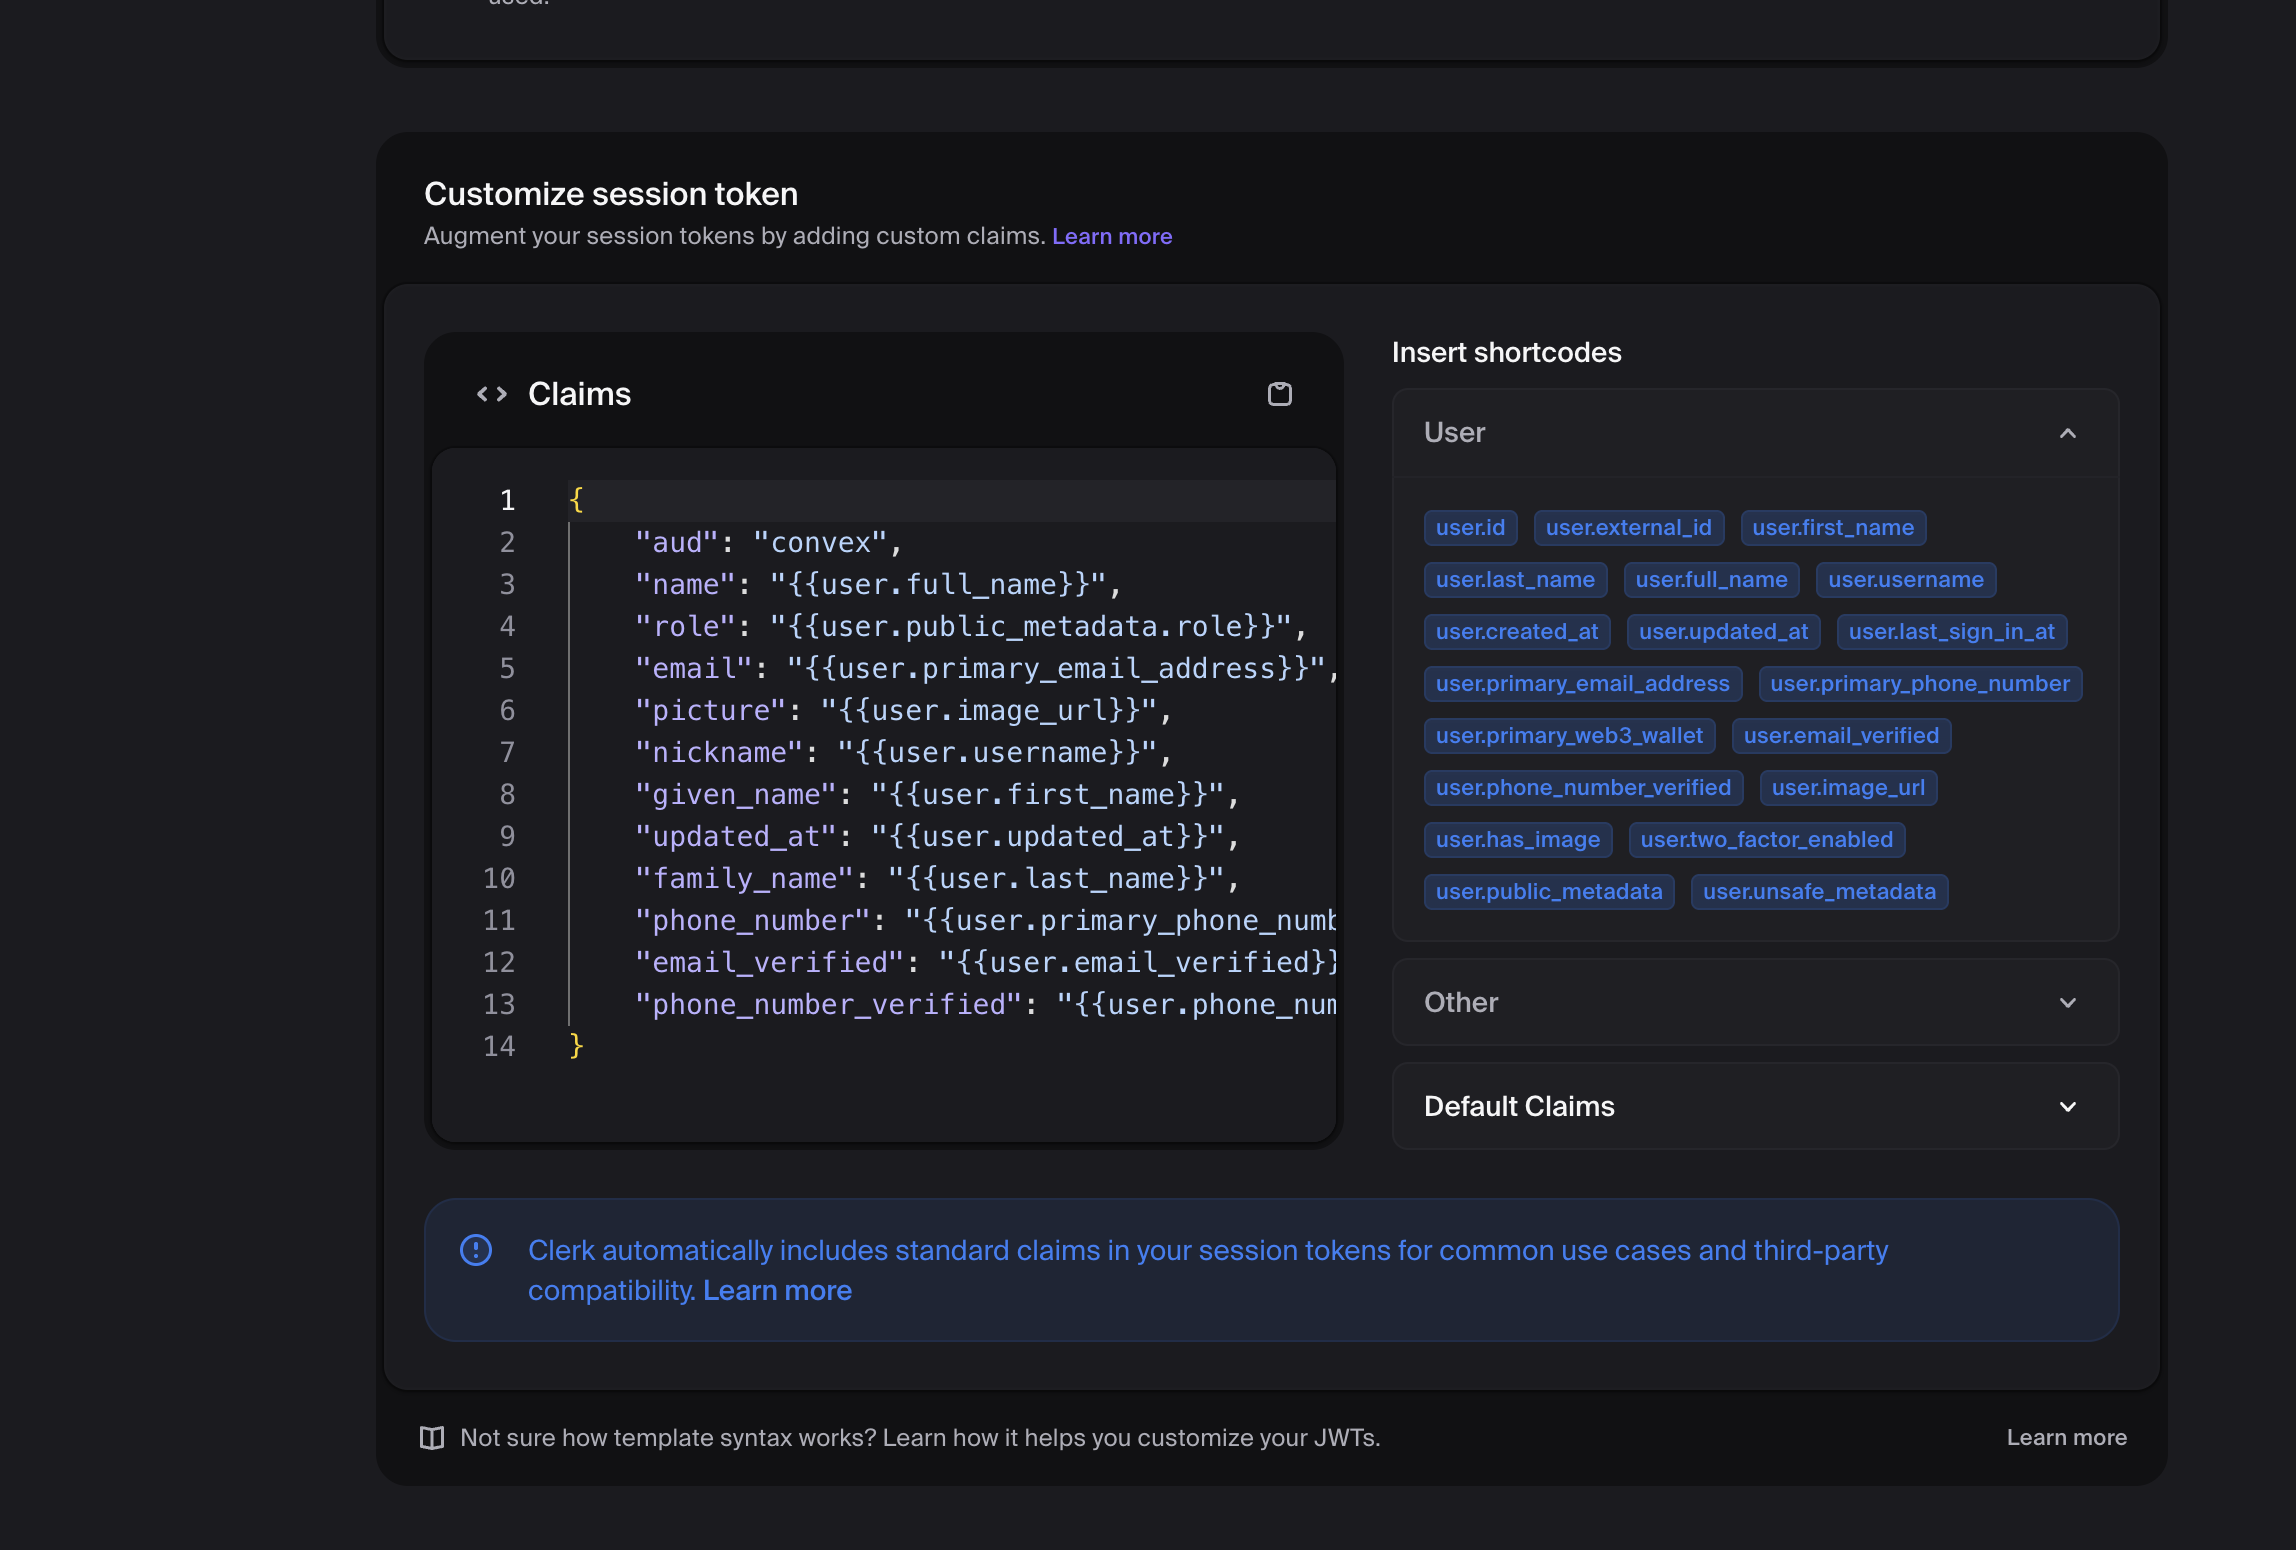
What each line does:
aud— the audience. Centrali validates this against the provider's allowed-audiences list. Use a stable string you control (centrali,my-app, whatever).name/email— straight from the Clerk user. Useful for policies that need per-user context.role/plan— pulled from Clerk'spublic_metadata. You set these via the Clerk Dashboard or the Clerk API; they ride along in every token.org_id/org_role— the active organization's ID and the user's role inside it.{{org.id}}is null if the user hasn't selected an organization, so your policies should handle that case.
Available Clerk variables for JWT templates:
| Variable | Meaning |
|---|---|
{{user.id}} | Clerk user ID |
{{user.full_name}} | User's full name |
{{user.primary_email_address}} | Primary email |
{{user.public_metadata.<key>}} | Anything you stored in public metadata |
{{org.id}} | Active organization's ID ({{organization.id}} is the old name for the same thing) |
{{org.role}} | User's role in the active organization ({{organization.role}} is the old name) |
{{org.slug}} | Active organization's slug |
Save the template.
Step 3: Copy the Clerk Issuer URL
Clerk generates an issuer URL per application. Centrali needs it to fetch the JWKS and verify signatures.
In the template editor, scroll to the Issuer field. It looks like:
https://<your-clerk-domain>.clerk.accounts.dev
Or, on a Clerk production instance:
https://clerk.<your-domain>.com
Copy it. You'll paste it into Centrali in the next step.
Step 4: Register Clerk as an External Provider in Centrali
In the Centrali console: Settings → External Authentication Providers → Add Provider.
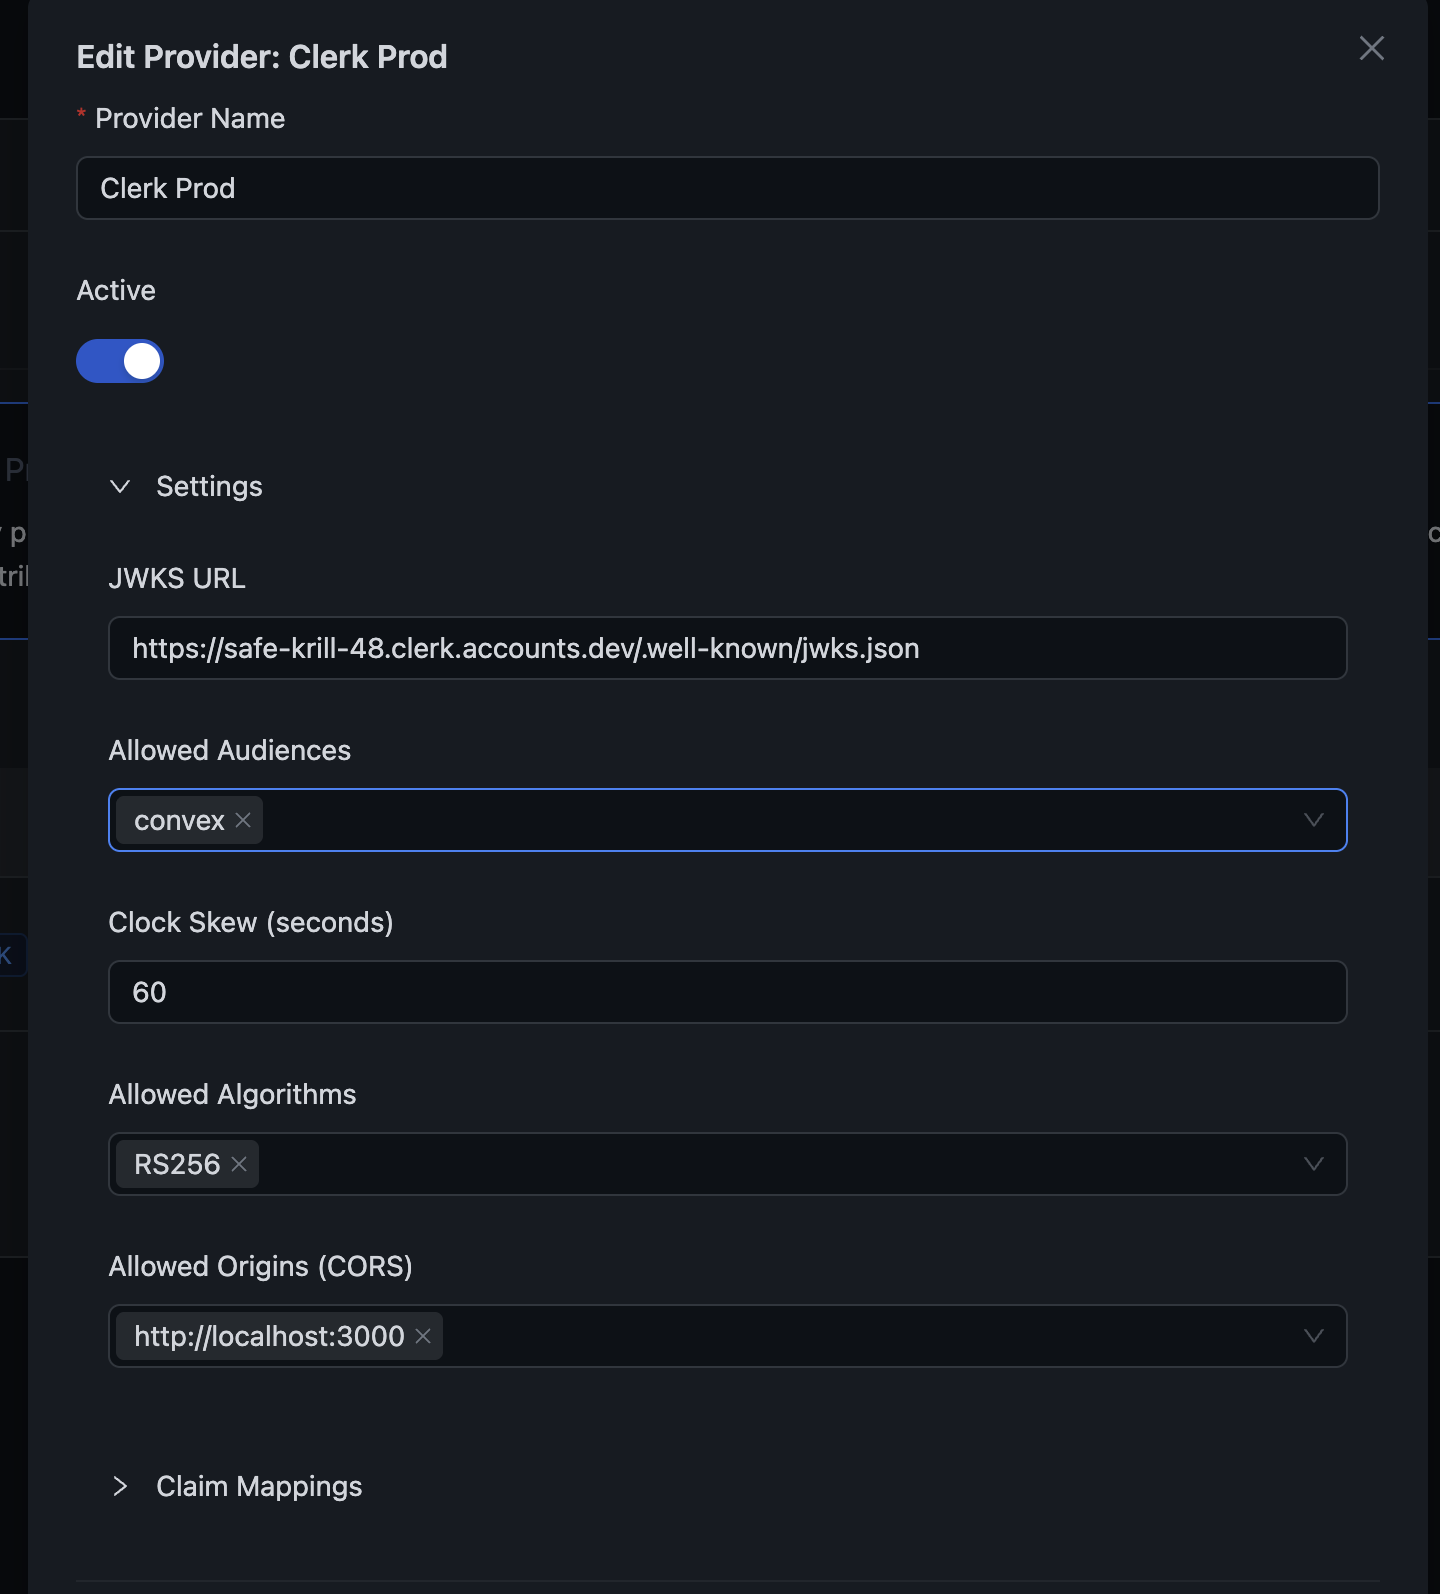
Fill in:
| Field | Value |
|---|---|
| Provider Name | Clerk (display label) |
| Provider Type | Clerk |
| Issuer URL | The URL you copied in Step 3 |
| Allowed Audiences | The aud value from your template (e.g., centrali) |
Save. Centrali fetches Clerk's JWKS and is now ready to validate tokens.
Step 5: Map the Claims
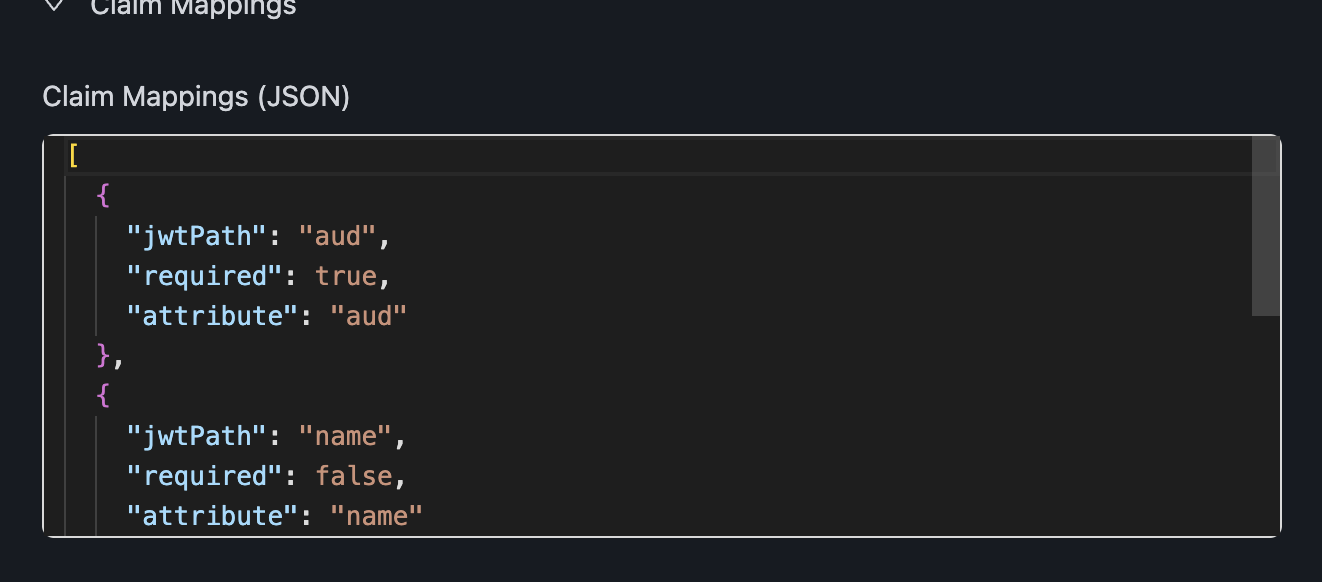
Claims in the JWT have to be mapped to attributes that your Centrali policies can reference. Same provider settings page, Claim Mappings section:
[{ "jwtPath": "aud", "attribute": "aud", "required": true },{ "jwtPath": "name", "attribute": "name", "required": false },{ "jwtPath": "email", "attribute": "email", "required": false },{ "jwtPath": "role", "attribute": "role", "required": false },{ "jwtPath": "plan", "attribute": "plan", "required": false, "defaultValue": "free" },{ "jwtPath": "org_id", "attribute": "org_id", "required": false },{ "jwtPath": "org_role", "attribute": "org_role", "required": false }]
Once saved, these claims become available in policies with an ext_ prefix:
ext_audext_nameext_emailext_roleext_planext_org_idext_org_role
Step 6: Use the Token in Your Next.js App
Get the token with Clerk's getToken({ template }) — the template name matches what you named it in Step 1:
// app/api/orders/[id]/approve/route.tsimport { auth } from '@clerk/nextjs/server';import { CentraliSDK } from '@centrali-io/centrali-sdk';const centrali = new CentraliSDK({baseUrl: process.env.CENTRALI_API_URL!,workspaceId: process.env.CENTRALI_WORKSPACE!,});export async function POST(request: Request,{ params }: { params: { id: string } }) {const { userId, getToken } = await auth();if (!userId) {return Response.json({ error: 'Unauthorized' }, { status: 401 });}const token = await getToken({ template: 'centrali' });if (!token) {return Response.json({ error: 'Failed to get token' }, { status: 500 });}const result = await centrali.checkAuthorization({token,resource: 'orders',action: 'approve',context: { orderId: params.id },});if (!result.data.allowed) {return Response.json({ error: 'Access denied' }, { status: 403 });}await approveOrder(params.id);return Response.json({ success: true });}
Write a policy that uses the mapped attributes — for example, "only org admins can approve orders":
{"name": "approve_orders","specification": {"rules": [{"rule_id": "org-admin-allow","effect": "Allow","conditions": [{ "function": "string_equal", "attribute": "ext_org_role", "value": "admin" }]}],"default": { "effect": "Deny" }}}
The policy reads ext_org_role — which came from {{org.role}} in the Clerk template, through the org_role JWT claim, through the org_role mapping. End to end.
Debugging — see the actual claims
The #1 reason the wiring fails is a mismatch between what Clerk puts in the token and what Centrali expects. A minimal debug page shows you the truth:
// app/debug/page.tsximport { auth } from '@clerk/nextjs/server';export default async function DebugPage() {const { getToken } = await auth();const token = await getToken({ template: 'centrali' });const claims = token? JSON.parse(Buffer.from(token.split('.')[1], 'base64').toString()): null;return <pre>{JSON.stringify(claims, null, 2)}</pre>;}
Hit /debug in development. You'll see exactly what Clerk sent — org_id, org_role, audience, everything. If a claim is missing or null, the issue is almost always:
{{user.public_metadata.plan}}is null because you haven't set the metadata on that user. Go to Clerk Dashboard → Users → Edit metadata.{{org.id}}is null because the user isn't in an organization, or hasn't selected one as active. CheckOrganizationSwitcheris rendered and the session has an active org.auddoesn't match Centrali's allowed audiences. The string in the template must match the string in the Centrali provider config exactly.
Common errors
"Unknown issuer" — the Issuer URL you pasted into Centrali doesn't match what Clerk is signing. Re-copy from the template settings; watch for trailing slashes.
"Token validation failed" — usually a JWKS fetch problem. Make sure the issuer URL is publicly reachable from Centrali's servers and that the token hasn't expired (default 60s lifetime is tight — bump to 300s while debugging).
"Access denied" with all the right claims — check you're using the ext_ prefix in policies, not the raw claim name. ext_org_role not org_role.
What's Next
This post assumed you want the basics working. For deeper coverage of related pieces:
- BYOT: Use Your Own Identity Provider with Centrali — full BYOT model, AuthZ-as-a-Service pattern, security guarantees
- Add Authorization to a Next.js App with Clerk + Centrali — end-to-end Next.js tutorial with Clerk sign-in + Centrali policies
Clerk handles authentication. Centrali handles authorization. The JWT template is the handshake between them — once it's set up, you never touch it again.